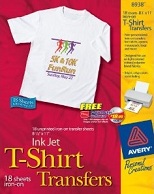
This is how to make your own iron on custom T-shirts, hats, tote bags, aprons, tablecloths, shorts, placemats, nurse & doctor scrubs, sweatshirts, mouse pads, scarves, & other accessories from your own home is simple!
In fact, you will probably already have most of the supplies necessary to do this, and most of the other supplies needed are cheap. The easiest and most inexpensive way to do this is to use “Iron-on” or “heat transfer” paper. So how do you make your own designs, where can you get the supplies, and how does it work, and how much does it cost? Just follow the easy instructions below to find out.
How to Make Iron Ons
Materials Needed
1. Fabric– First you will need to select a material that you want to use the iron on (or heat transfer) paper on (t-shirts, etc). Typically, the best material to use is a poly or cotton fabric. Again, you can use this method to make your own shirts, tote bags, scrubs, aprons, mouse pads & more. Also, you may want to pre-wash the fabric before applying the iron-on. Just buy the items (or bulk of items) that you plan on using for making the finished product. You can get fabric at any local store, supplier, or online, or you can use clothing you already have to practice on.
2. Printer– You can use a standard ink jet printer (such as Lexmark®, Canon®, etc.) to use to print our your design. You cannot use a laser printer, because it uses heat to print & this will destroy transfer paper. You can only use an ink jet printer (with colored or plain black ink depending on what you want your design to look like).
3. Iron– You will also need a standard household iron or a heat press. Make sure that you turn off the steam feature first! You can only use dry heat.
4. Sheet/Pillow Case– A large pillow case or sheet. You will use this to place between the shirt or fabric to prevent “bleeding through” of the transferred image during the ironing process.
5. Ironing Surface– A hard smooth surface that can withstand high heat. If you do not have a heat press, then ironing will work just fine. However, make sure to use a hard smooth surface when ironing. A material such as Formica is recommended. You should NOT use an ironing board, glass, granite, concrete, heat sensitive, or heat-sinking surfaces.
6. Transfer Paper– Iron-on paper (also called heat transfer, image transfer, or press paper). You can buy this at your local Wal-mart®, Kmart®, on eBay®, or online. It is either found in the “hobby” or “stationary” section. You should use “Light” iron-on paper for lighter fabrics, and “Dark” paper for darker fabrics for the best results.
The retail cost of this paper is usually only $2-$7 (depending on how many sheets you get). Just one sheet will usually produce 3-8 images. Once you have all of the necessary materials, you are ready to make your design.
How to Make a Design for Iron On Shirts
The best way to do this is to software on your computer such as Paint®, Photoshop®, Microsoft Word®, a scanner, or any software where you can design pictures, logos, or just plain text.
You can then create up scan your design or logo. You can make anything you can imagine! Have a funny phrase or picture? You could use that! Or promote your own product or website! Just make your design, “Flip” the image backwards, & print it out with your inkjet printer (just like you would on a regular sheet of paper). Flipping the image backwards is easy. The software you used should have a “flip” or “rotate” image button. Just click that to make the image reads backwards.
Then, just print the image on the front (blank) side of the iron-on transfer paper and allow the image to dry for a couple of minutes.
Once the transfer paper has dried, you can then iron it onto the T-shirt. Make sure the iron is hot (see recommended iron settings in the iron on transfer instructions). For some iron on papers, it may be necessary to cut the image out of the transfer paper. Then, place the cut out section you want to iron onto the t-shirt, hat, apron, mousepad (or other item you plan to iron onto).
Finally, use the iron to evenly apply heat to the transfer paper. Follow the instructions for the paper. In most cases, it only takes 1 minute or so to transfer the image onto the fabric. Then, slowly remove the backing, and you’re finished!
Washing Instructions
When you are ready to wash your item, follow these simple instructions to ensure your design will last a long time:
- For best results, wash the item before applying the transfer.
- Turn garment inside out when washing.
- Wash items separately from other (only first time).
- Machine wash cold (no dry cleaning).
- Use color safe detergent (avoid bleach).
- Tumble dry on low.
- Never iron over transferred images. This will melt the image onto the iron. Only iron “around” the image.
Making T-Shirts in Bulk Quantities
If you decide to do this method to make money online, you will want to first practice & buy only small supplies until you gain more experience & make more sales. Then, you may want to consider buying a “heat press” as well as buying transfer paper, copyrighted images, and fabric in the bulk from wholesale suppliers. This can save money & increase your profits, as well as speeding up the time it takes to make a finished product.
