Learn how to spike an IV bag and how to prime IV tubing.
IV therapy is a standard part of patient care, and as a nurse you will be spiking and priming thousands of IV bags over your career. This skills takes a little bit of practice, but once you learn it, you will never forget it.
What is the goal of spiking an IV bag and priming the IV tubing?
The goal is to deliver an intravenous solution or medication to the patient’s bloodstream via tubing. It achieves this with the help of an IV pump (sometimes gravity is used rather than a pump) which regulates the flow of the solution.
So, what does “spiking the IV bag mean“? This means you will be penetrating the IV bag with the spike of the IV tubing into the spiking port of the IV bag so the contents can flow into the IV tubing and then into the patient.
What does “priming the IV tubing” mean? This means you will allow the solution in the IV bag to flow through the tubing to remove air. ALL air must be removed from the tubing to prevent an air embolism. Very, very small bubbles are okay. You will FIRST spike the IV bag and then prime the tubing.
Quick Tips:
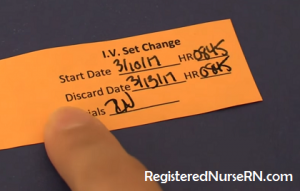
Always label your tubing with the time and date you initiated it and when it expires. Most IV tubing supplies come with tubing labels or your hospital will have them stocked in patient alcoves. *Always follow your hospital’s protocol for tubing changes.
The CDC.gov recommends changing IV tubing that is used continuously and not used for blood, blood products, or fat emulsions (TPN, Lipids) every 96 hours. However, IV tubing used for blood, blood products, or fat emulsion should be changed every 24 hours.
Many hospital require you change out tubing that is NOT used for blood, blood products, or fat emulsions every 3-4 days (again ALWAYS follow hospital protocols) and 24 hours for tubing used for blood, blood products, and fat emulsions.
Video Demonstration on How to Spike and Prime an IV Bag
Steps on How to Spike and Prime an IV Bag
- Wash hands (you will be using aseptic technique to prevent contamination to the IV line or bag)
- Open tubing packaging and un-kink it. Then roll the clamp to the closed position.
- Date and time the tubing (do it at the beginning so you don’t forget or it may get wet or lost)
- Open IV bag packaging (if it has it) and hold the IV bag in your non-dominant hand upside down…there are two ports on the bag…a medication administration port which you won’t be using and spiking port (see the picture below)…it is best to wear gloves during this part so you don’t get contaminated with the medication while spiking and priming…some IV solutions/medications can be dangerous…like nitroglycerin,chemo agents etc.

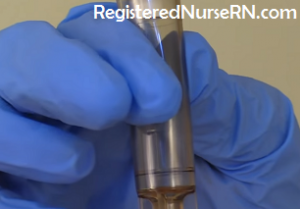
- Pull stopper off spiking port (keep port opening sterile and don’t touch it)
- Remove spike sleeve (don’t touch the spike)
- Spike the IV bag by inserting the spike into the spiking port (do this by performing a twisting motion)

- Hang bag on the IV pole
- Squeeze drip chamber until half way full (most chambers have a line on them..so fill to the line)
- Un-clamp clamp roller and allow the solution to drain all the way through the tubing
- Analyze the tubing and make sure there are no large air bubbles (very small ones are okay)…you can flick it or re-flush the line again to remove them. Note in the picture below the large amount of air…you don’t want this.

- Clamp the tubing shut with the roller clamp
- Connect to the patient when ready
More Nursing Skills
References
- CDC – Replacement of Administration Sets – 2011 BSI Guidelines – HICPAC. (2011). Cdc.gov. Retrieved 8 March 2017, from https://www.cdc.gov/hicpac/BSI/07-bsi-background-info-2011.htmles-2011.html